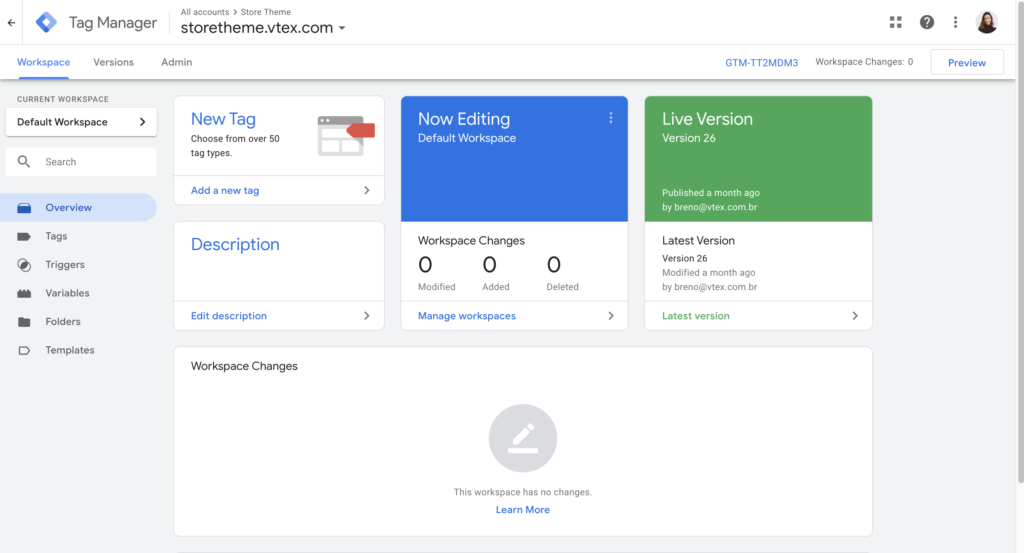
Intro:- How to Add Google Tag Manager in my WordPress Website? Google Tag Manager is a tag management system (TMS) that allows you to quickly and easily update measurement codes and related code fragments collectively known as tags on your website or mobile app.

Initial release date: October 1, 2012
Developer: Google
About:- How to Add Google Tag Manager in my WordPress Website? Tag Manager gives you the ability to add and update your own tags for conversion tracking, site analytics, remarketing, and more. There are nearly endless ways to track activity across your sites and apps and the intuitive want.
How to Add Google Tag Manager in my WordPress Website? If you are reading this article that means you want to know how to add a google tag manager in my wordpress website, right? But, you don’t have any idea how or where to start. If you are looking for an easy guide on how to add google tag manager in my WordPress website then you are at the right place. Just you have to read this article properly. In this article, I will share the proper guide on how to add a google tag manager in my WordPress website. Even if you are a beginner is no worry about it. The steps below guide are for both Beginners & Experts.
But before beginning to start an article, there are some major points that should know, like(FAQs)
- What is Google Tag Manager?
- Is Google Tag Manager free to use?
- What is the difference between Google Analytics and Google Tag Manager?
- Is Google Tag Manager good for SEO?
- What can be tracked with Google Tag Manager?
Let's Find Out. ...
1. What is Google Tag Manager?
Google Tag Manager gives you the ability to add and update your own tags for conversion tracking, site analytics, remarketing, and more. There are nearly endless ways to track activity across your sites and apps, and the intuitive design lets you change tags whenever you want.
2. Is Google Tag Manager free to use?
Google Tag Manager delivers simple, reliable, easily integrated tag management solutions— for free.
3. What is the difference between Google Analytics and Google Tag Manager?
Google Analytics is an analytics tool that helps you track and analyze how users interact with your website and app. Google Tag Manager is a tag management system that makes it easy for teams to add and edit tags for granular user event insights.
4. Is Google Tag Manager good for SEO?
Google Tag Manager is a fantastic tool to give SEOs the flexibility to test SEO modifications to stuff like meta descriptions, structured data, and canonicals. Bear in mind that these should be temporary changes that will at some point be implemented by the development team.
5. What can be tracked with Google Tag Manager?
Google Tag Manager is a tag management system (TMS) that allows you to quickly and easily update measurement codes and related code fragments collectively known as tags on your website or mobile app.
Let's Explore. ...
How to Add Google Tag Manager in my WordPress Website?
Video Tutorial!
How to Install and Set Up Google Tag Manager in WordPress Manually?
There are two methods to install Google Tag Manager in WordPress — Manually and with a plugin. While using a plugin might be easier, the manual method gives you more customization options over the code. For this reason, we recommend opting for the manual method for advanced users.
1. Create a Google Tag Manager Account
First, you need to set up a Google Tag Manager account. Follow these steps:
- Open the Google Tag Manager homepage. Click Start for free and log in with your Google account.
- Click Create Account, either on the top right or the icon on the page center.
- On Account Setup, you will need to fill in your account name. We recommend using your company’s name if it’s your business.
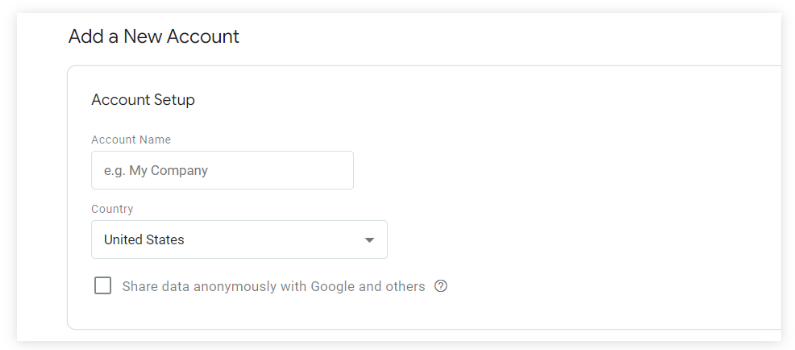
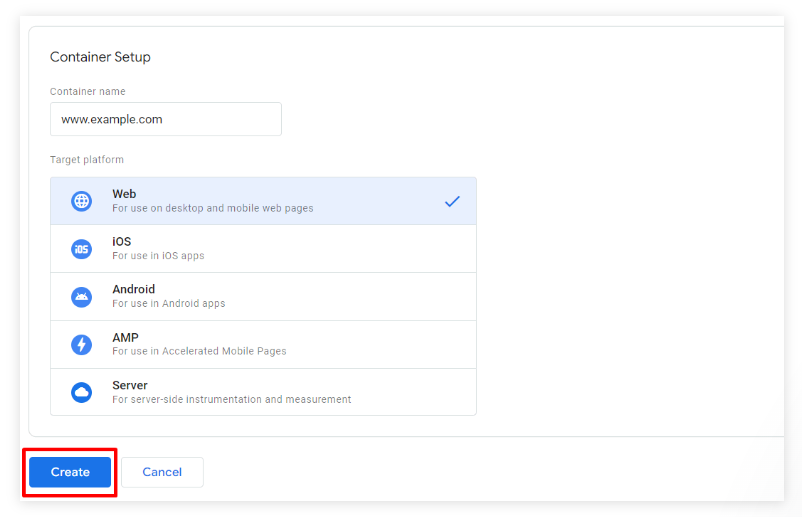
4. Fill in your domain name and choose Web as your target platform on Container Setup.
5. Once you’ve filled in all of the information, click Create.
6. Then, the terms of service agreement window will show. Read the information carefully, and tick “I also accept the Data Processing Terms as required by GDPR.”

7. Click “Yes” to create your account.
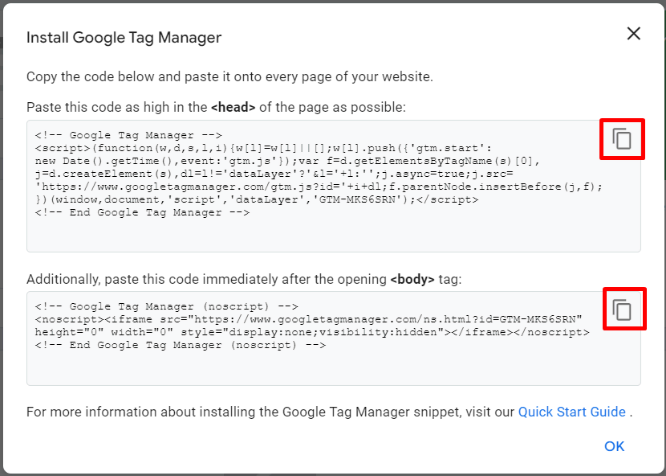
8. Finally, you will see a pop-up window with two Google Tag Manager code snippets for your website. The first one is for the header, and the second code snippet is for the body section of your website. To copy these code snippets, simply click on the copy icon.
2. Add the Tracking Code to WordPress
The next step is adding the code to your WordPress site. To do so, follow the steps below:
1. Log in to your WordPress account and navigate to Appearance -> Theme File Editor on your sidebar.
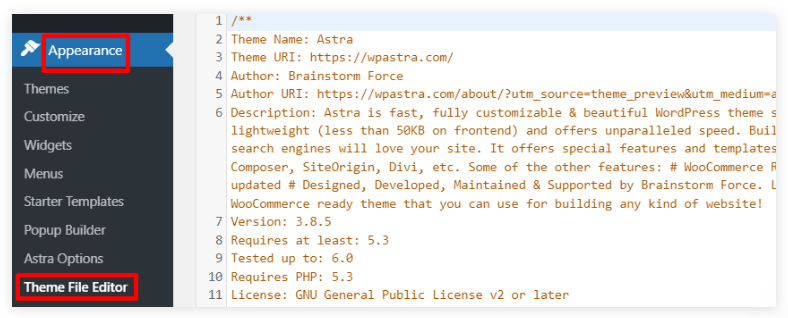
2. On the right side, check the Theme Files.
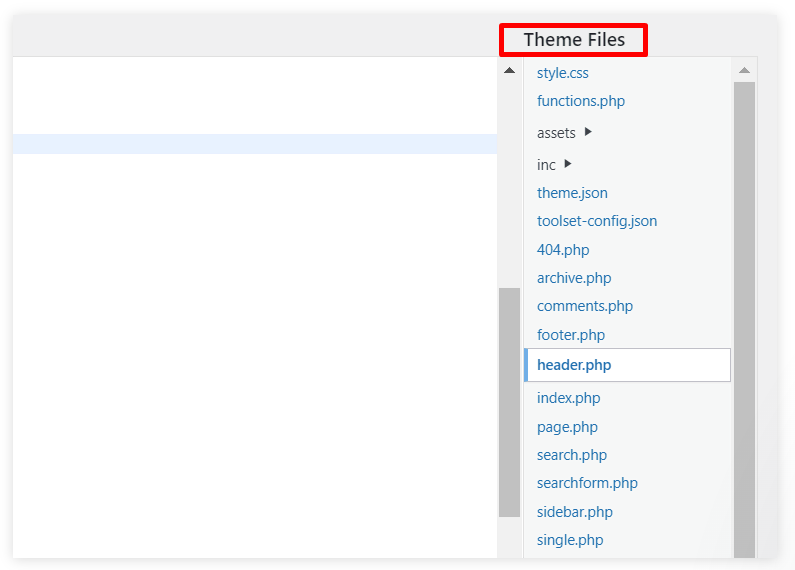
As WordPress themes vary in terms of design and functionality, they may have different types of files. Some typical files include functions.php, footer.php, and header.php., but they may have different names. The file for the heading, usually named header.php, is where you will make changes with the Google Tag Manager’s code snippets. If you can’t find header.php in your WordPress theme files, contact the theme developer for more information.
3. After copying the Google Tag Manager code snippet, click header.php and locate the <head> and </head> tags to change the header section. Usually, you can also customize the opening <body> tag in the same file. However, other themes may have the body section in another template file.
4. Paste the first code for the header section as high in the <head> of the page as possible.
5. Also, paste the second code after the opening <body> tag.
6. Click Update File at the bottom of the page to save changes.
7. Once you’re finished with adding snippets to your WordPress website, go back to your Google Tag Manager dashboard and click Preview.

8. It will direct you to a new window to connect Tag Assistant to your website. Enter your site URL and click Connect.
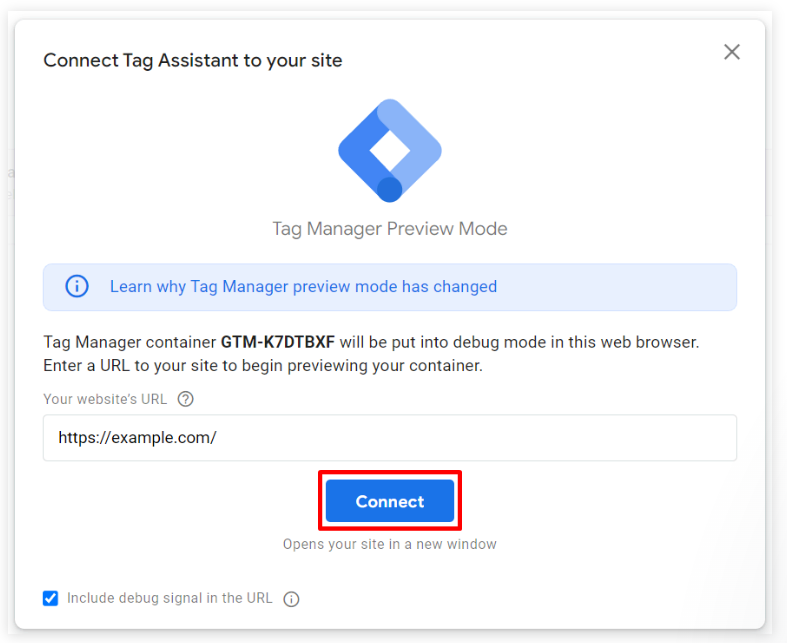
9. A new window to your site will open, and Tag Assistant will notify you of the successful Google Tag Manager connection. Click Finish, navigate to the preview window, and click Continue.
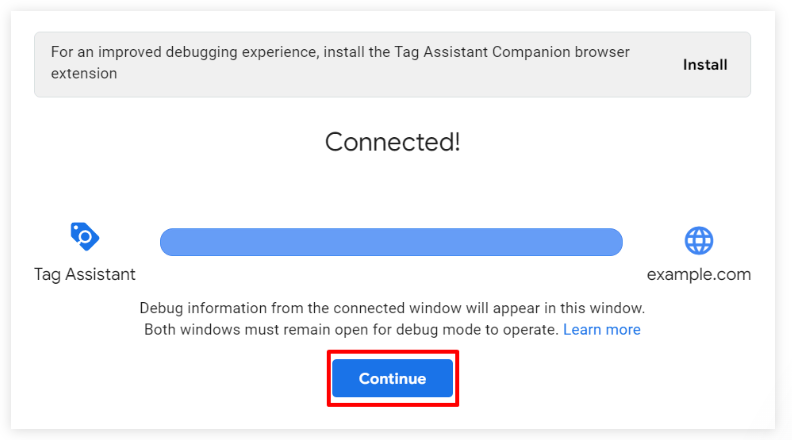
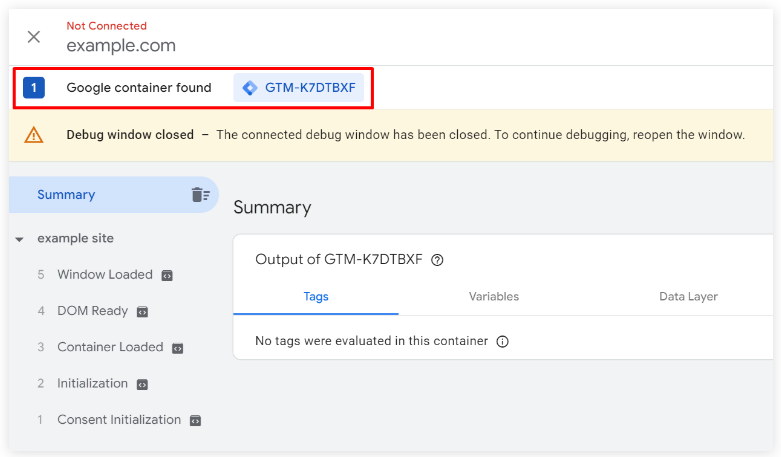
10. You will see the “Google container found” notification along with your Google Tag Manager container ID, meaning the installation of Google Tag Manager on your WordPress website is complete.
11. Close the preview window, and click Submit.

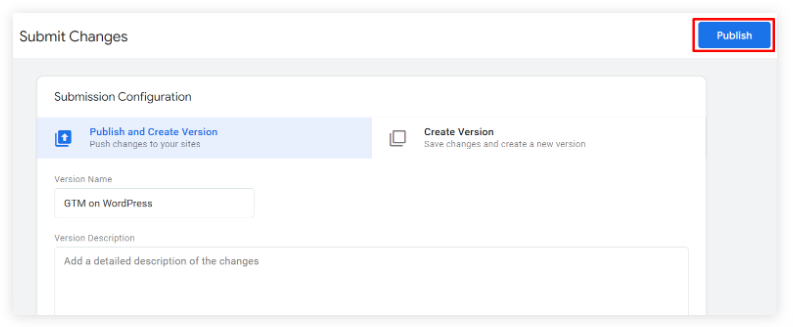
12. After that, enter the version name. For example, you can name it “GTM on WordPress”. Then, click Publish.
3. Publish a New Tag
You will need to create a tag to start using Google Tag Manager for tracking user behavior. To accomplish this, follow the steps below:
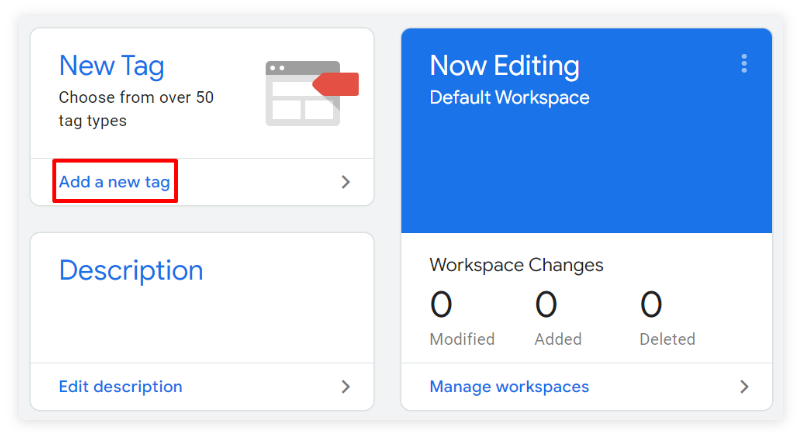
1. Navigate to your Google Tag Manager dashboard and click Add a new tag, where you can choose from more than 50 tags supported by Google Tag Manager.
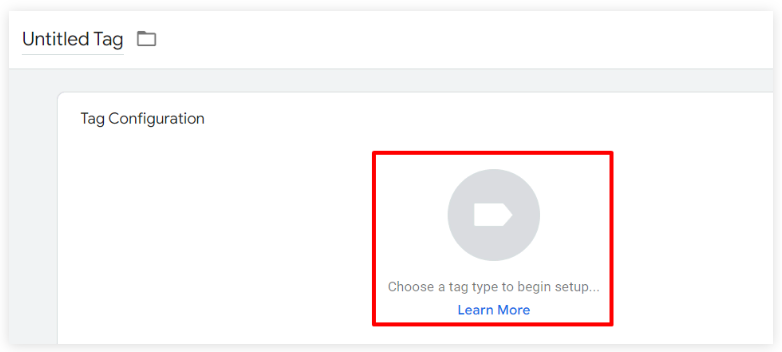
2. Click on the icon to choose a tag type.
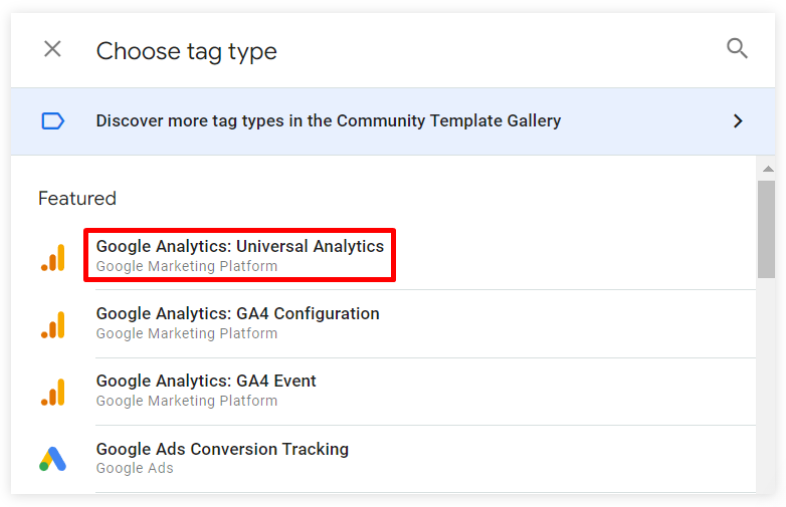
3. Then, you will see many featured tag types on the list, including several Google Analytics tags. You can choose the Universal Analytics tag if you have a Google Universal Analytics account.
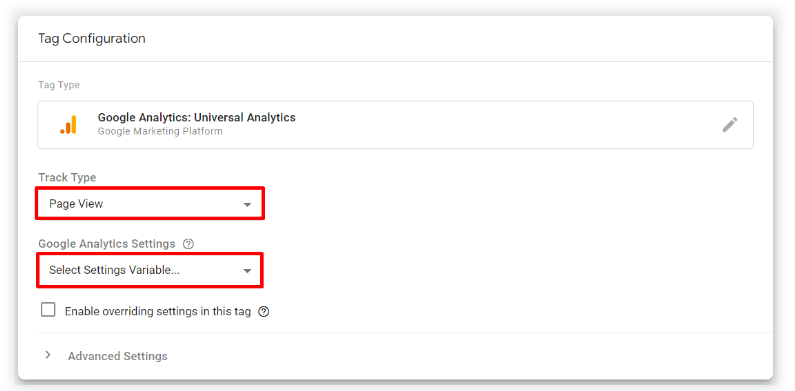
4. For Track Type, select which element you want to track on your WordPress website from the list. Also, choose New Variable for the Google Analytics settings.
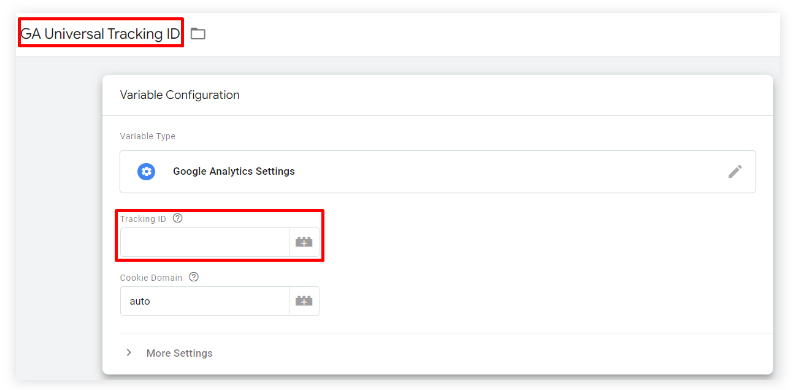
5. Then, a variable configuration window will show. Enter your Google Universal Analytics tracking ID, rename the variable, and click Save. You can find your tracking ID in the Admin tab under Property -> Tracking Info.
6. After that, move on to the next section to choose a trigger.
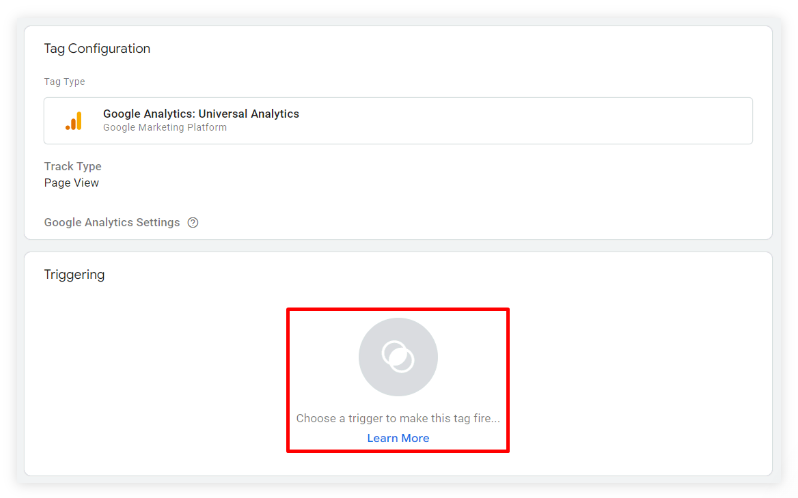
7. Tick the triggers you want to use, and click Add.
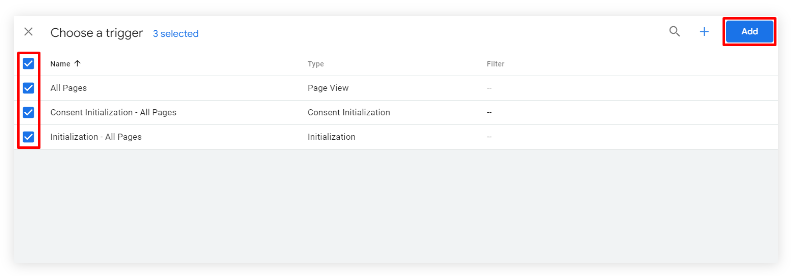
8. Then, rename the tag and click Save. Before publishing your tag, use the Preview mode to check if the tag works on your website.
That is it — you have successfully created a Google Analytics tag.
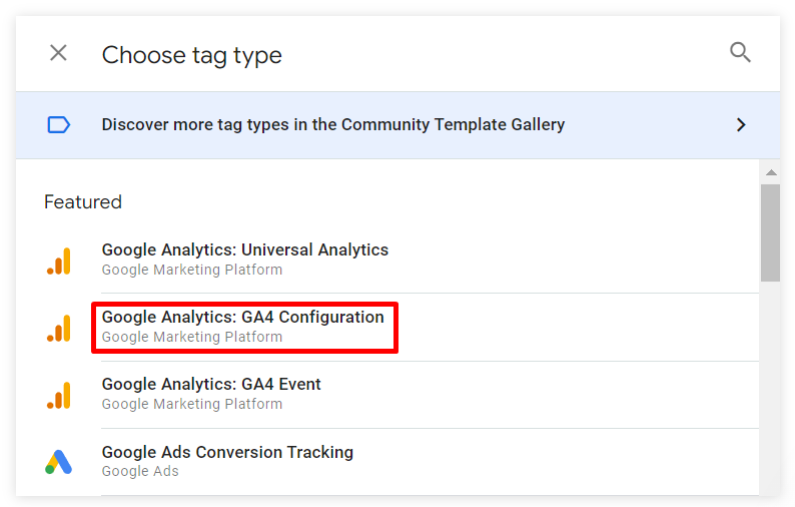
Unlike Universal Analytics, you will have to enter your measurement ID in the tag configuration. To get it, set up a data stream on your Analytics’ Property tab first.
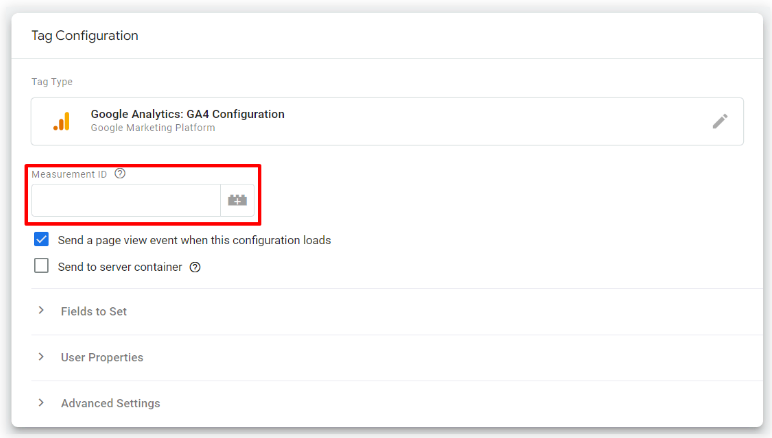
Click Save, and you can continue with the steps we’ve explained to set up a trigger for the Universal Analytics tag. Now that you’ve set up a Google Analytics tag, the steps to manually installing Google Tag Manager on your WordPress site are complete.
- Leave a comment below! 🙂

Authored By The Er. Pramod Adhikari!
The Blogger, Author & CEO’s The Infinity Company! B.Tech in CSE (Computer Science & Engineering) From Sambhram College, Bengaluru-560097, Working Worldwide as Software(Web/App) Developer!
