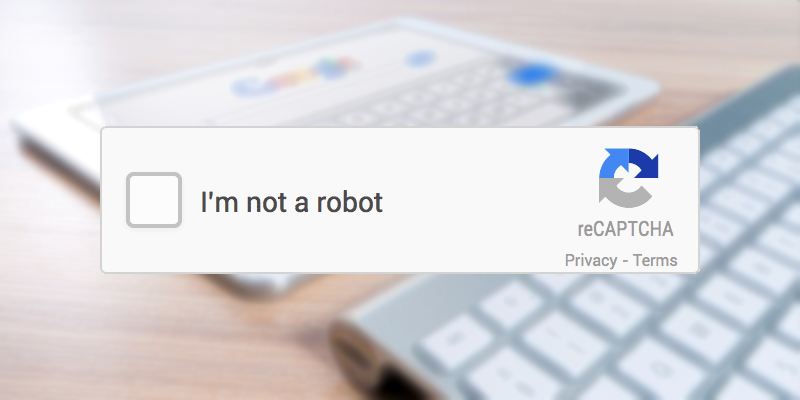
Intro:- How to Add reCAPTCHA into a Website? reCAPTCHA is a CAPTCHA system that enables web hosts to distinguish between human and automated access to websites. The original version 2 also asked users to decipher text or match images if the analysis of cookies and canvas rendering suggested the page was being downloaded automatically. Since version 3, reCAPTCHA will never interrupt users and is intended to run automatically when users load pages or click buttons. reCAPTCHA is owned by Google.

Initial release date: 27 May 2007, Developer: Google
About:- How to Add reCAPTCHA into a Website? reCAPTCHA system that enables web hosts to distinguish between human and automated access to websites. The original version asked users to decipher hard-to-read text or match images.
reCAPTCHA analyzes interactions with the website to detect if they are made by a human or some form of automated abuse. Sometimes, you may see a “failed reCAPTCHA check” error message while trying to create or amend your account. This means the website believes your actions may be those of a bot.
How to Add/Insert reCAPTCHA into a Website? If you are reading this article that means you want to know how to add/insert reCAPTCHA into a Website, right? But, you don’t have any idea how or where to start. If you are looking for an easy guide on how to add/insert reCAPTCHA into a website then you are at the right place. Just you have to read this article properly. In this article, I will share the proper guide on how to add/insert reCAPTCHA into a website. Even if you are a beginner is no worry about it. The steps below guide are for both Beginners & Experts.
But before beginning to start an article, there are some major points that should know, like(FAQs)
- What is reCAPTCHA?
- How do I use reCAPTCHA?
- How to get reCAPTCHA keys?
- Why am I getting a reCAPTCHA error?
- Is Google CAPTCHA free?
Let's Find Out. ...
1. What is reCAPTCHA?
reCAPTCHA is a free service from Google that helps protect websites from spam and abuse. A “CAPTCHA” is a Turing test to tell humans and bots apart. It is easy for humans to solve, but hard for “bots” and other malicious software to figure out. By adding reCAPTCHA to a site, you can block automated software while helping your welcome users to enter with ease. Try it out at https://www.google.com/recaptcha/api2/demo.
2. How do I use reCAPTCHA?
Just click the checkbox:

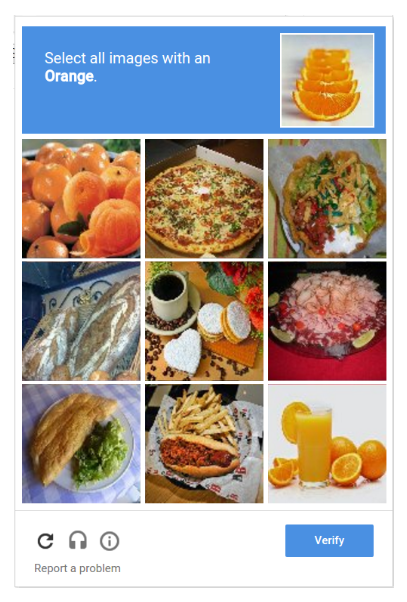
If you see a green checkbox, congratulations! You’ve passed our robot test (yes, it’s that easy). You can carry on with what you were doing. Sometimes we need some extra info from you to make sure you’re human and not a robot, so we ask you to solve a challenge:
3. How to get reCAPTCHA keys?
Follow these steps in order to get and enable reCAPTCHA protection using the official Google Captcha keys:
- Open your WordPress admin dashboard.
- Navigate to the plugin Settings page.
- Click the “Get the API Keys” link.
- Enter your domain name and click the “Create Key” button.
- You will see your public and private keys. Copy them and paste them to the appropriate fields on the plugin Settings page.
- Save changes.
4. Why am I getting a reCAPTCHA error?
If you’re seeing this reCAPTCHA challenge, your browser environment doesn’t support the reCAPTCHA challenge, and your browser environment doesn’t support the reCAPTCHA checkbox widget. There are a few steps you can take to improve your experience: Make sure your browser is fully updated (see minimum browser requirements) Check that JavaScript is enabled in your browser.
5. Is Google CAPTCHA free?
reCAPTCHA is a free service that protects your website from spam and abuse. reCAPTCHA uses an advanced risk analysis engine and adaptive CAPTCHAs to keep automated software from engaging in abusive activities on your site. It does this while letting your valid users pass through with ease.
Let's Talk About That. ...
How to Insert Google reCAPTCHA into a Website?

In this post, I will show you how to use Google’s “reCAPTCHA” (https://google.com/recaptcha/admin) within your site, and thus avoid the accumulation of “spam”. The first step is to authenticate with your Google account and access the address: https://google.com/recaptcha/admin
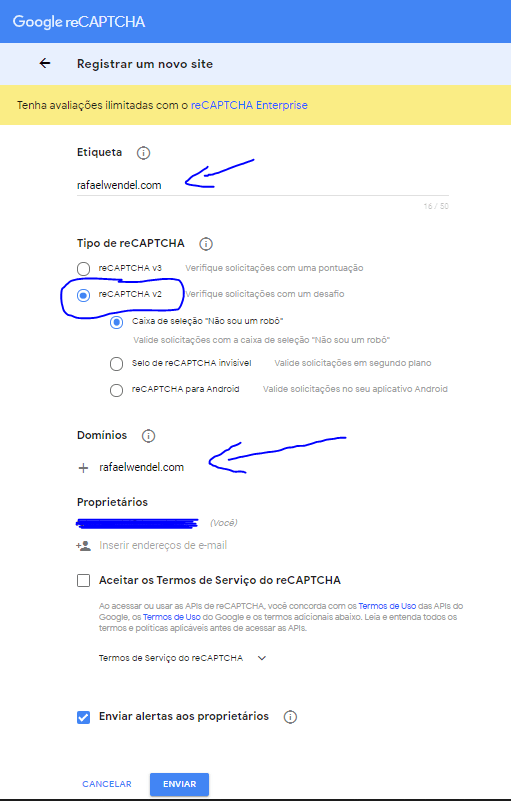
Image 1: New site registration reCAPTCHA form
On this page, we are going to add a new website. In the field “Label(Etiqueta)” you define the name you want, to remember better if you have several “recaptchas” for several different sites. I put the domain myself.
In “Type of reCAPTCHA” you have several options. In my case, I selected the option “reCAPTCHA v2” and then the sub-option “Checkbox ‘I’m not a robot'”.
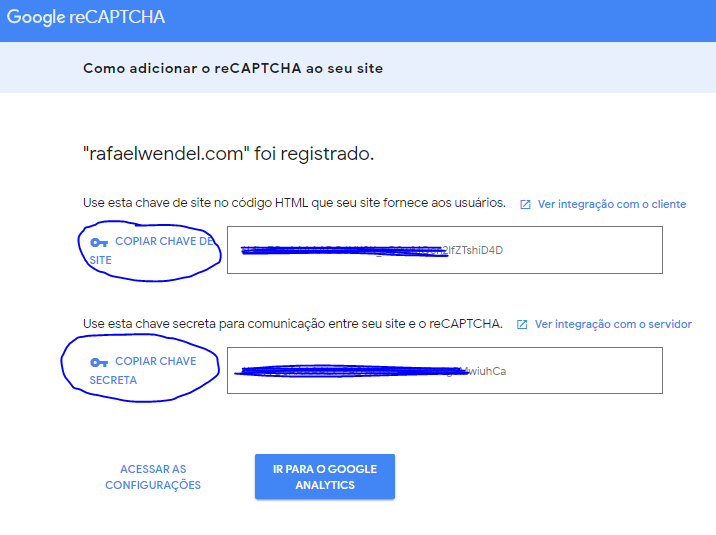
Image 2: reCAPTCHA Site Key and Secret Key
It is important that you copy these 2 keys that were generated (the site key and the secret key). We will use the first one to create the field “l am not a robot” in our form and the second one we will use to validate the verification whenever our form is submitted.
On our website now, the first thing we have to do is add the “javascript” file that will help us insert and validate the captcha. Before closing the “head” tag of the page that contains the form, put the following code:
<script src=’https://www.google.com/recaptcha/api.js’></script>
Now let’s go to the form we want to insert the reCAPTCHA.
<html>
<head>
<title>reCAPTCHA</title>
<script src=’https://www.google.com/recaptcha/api.js’></script>
</head>
<body>
<form method=”post” action=”verify.php”>
<label>Nome:</label><input type=”text” name=”nome” /><br />
<label>Email:</label><input type=”email” name=”email” /><br />
<div class=”g-recaptcha” data-sitekey=”PASTE-YOUR-SITE_KEY-HERE”></div>
<button type=”submit”>Enviar</button>
</form>
</body>
</html>
See that in line 10 I put the div “g-recaptcha” and in the attribute “data-sitekey” we should insert precisely the site key that we copied from Google’s reCAPTCHA panel. (NOTE: The “action” of this form submits the information to the verify.php file and therefore it will be in this file that I will verify if the reCAPTCHA was interacted correctly).
Running the page, we can see that reCAPTCHA is displayed:
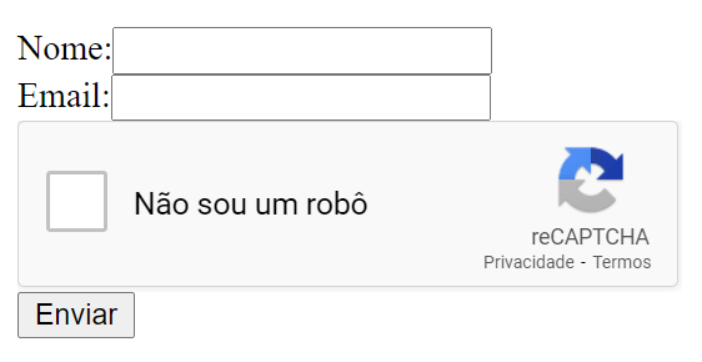
Image 3: Inserting the field "I'm not a robot" in our form
Now, in the verify.php file, let’s check if everything went correctly with reCAPTCHA. To do this we will retrieve the information “g-recaptcha-response“, which was submitted via POST along with the other form data.
<?php
$captcha = isset($_POST[‘g-recaptcha-response’]) ? $_POST[‘g-recaptcha-response’] : null;
if(!is_null($captcha)){
$res = json_decode(file_get_contents(“https://www.google.com/recaptcha/api/siteverify?secret=PASTE-YOUR-SECRET_KEY-HERE&response=”.$captcha.”&remoteip=”.$_SERVER[‘REMOTE_ADDR’]));
if($res->success === true){
//CAPTCHA validado!!!
echo ‘Tudo certo =)’;
}
else{
echo ‘Erro ao validar o captcha!!!’;
}
}
else{
echo ‘Captcha não preenchido!’;
}
In line 6 we make a request to check if the captcha is valid. See that we must pass our secret key in the URL for the process to work. This request will return a json with the success information. If it is true, it means that the captcha has been validated.
And ready! That way your form will be more protected!
On the Google dashboard, you can view a report containing the requests/checks, suspicious requests, and so on.
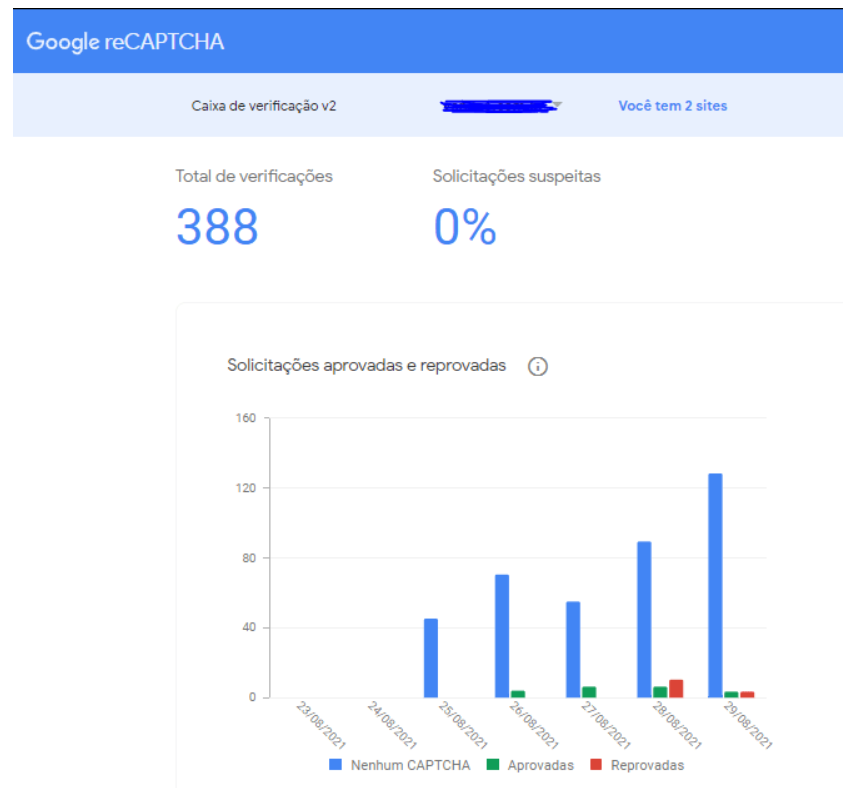
Image 4: Google reCAPTCHA (statistics and reports panel)
I hope this content is useful to you.
See you!!!
- Leave a comment below! If you got the article helpful!

Authored By The Er. Pramod Adhikari!
The Blogger, Author & CEO’s The Infinity Company! B. Tech in CSE (Computer Science & Engineering) From Sambhram College, Bengaluru-560097, Working Worldwide as Software (Web/App) Developer!
