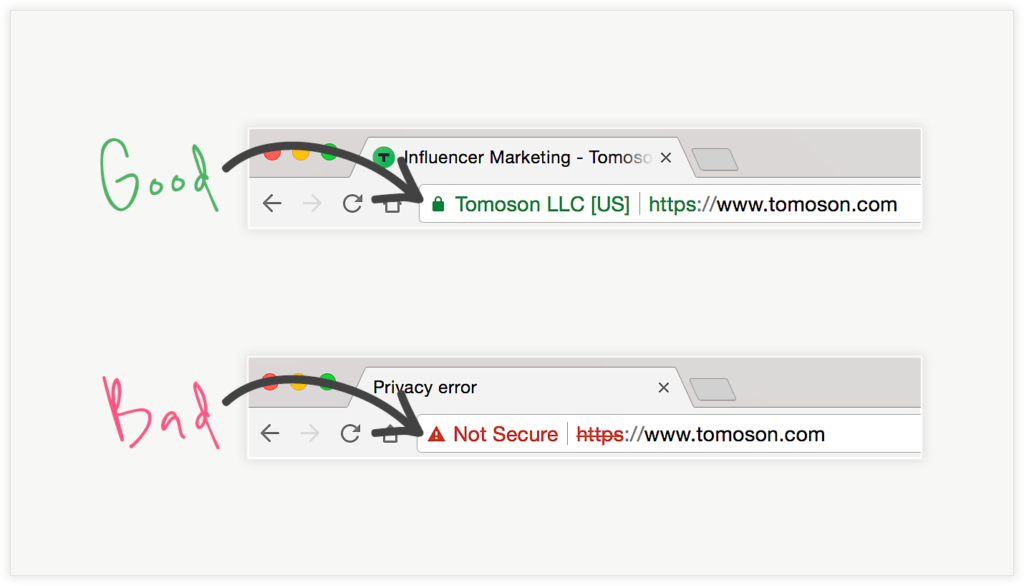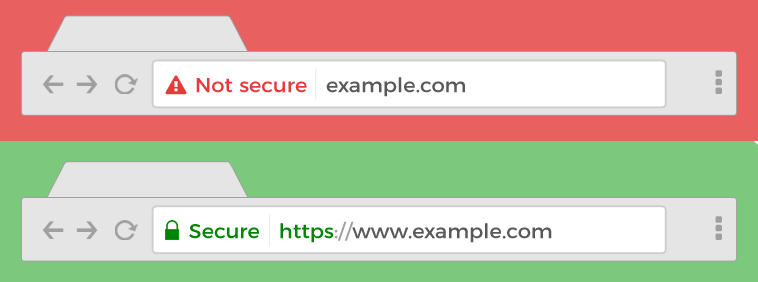
Intro:- How to Fix the “Not Secure” Website Warning in Google Chrome? This indicates the web page is not providing a secure connection to visitors. When your browser connects to a website, it can either use the secure HTTPS or the insecure HTTP protocol. If a site’s URL begins with HTTP, it means the connection is insecure, which triggers the “Not Secure” warning.
When visiting a website with a “Not Secure” warning, all data and sensitive information being sent to the website can be stolen and modified. This warning is primarily because the website is running on an unsafe HTTP protocol rather than a secure HTTPS protocol.

This warning error message would often deter visitors from continuing to use the website, which is why having a secure message in the address bar can have a major impact on a site’s overall image and reputation.
About:- Google’s Chrome browser used to display a green padlock in the search bar for secure sites. When it came to unsecured sites, however, users had to click a small icon that appeared in the search bar in place of the green padlock. Doing so would show a text bubble saying, “Your connection to this site is not secure.”
With the release of Chrome 68, Google started displaying a green padlock on all HTTPS sites. Chrome deems all HTTP sites as insecure a third-party can intercept data transmitted between such websites and users and servers.
How to Fix the “Not Secure” Website Warning in Google Chrome? If you are reading this article that means you want to know how to fix the “Not Secure” website warning in Google Chrome, right? But, you don’t have any idea how or where to start. If you are looking for an easy guide on how to fix the “Not Secure” website warning in Google Chrome then you are at the right place. Just you have to read this article properly. In this article, I will show you a step-by-step tutorial on how to fix the “Not Secure” website warning in Google Chrome. Even if you are a beginner there is no worry about it. The steps below are for both beginners & experts.
But before beginning to start a blog, there are some major points that you should know, like(FAQs)
- What happens if you enter a not Secure website?
- How do I fix this webpage is not secure?
- Is a not Secure website a virus?
- Should I trust a not secure website?
- Why should you not visit an insecure website?
Let's Find It Out;
1. What happens if you enter a not Secure website?
When visiting a website with a “Not Secure” warning, all data and sensitive information being sent to the website can be stolen and modified. This warning is primarily because the website is running on an unsafe HTTP protocol rather than a secure HTTPS protocol.
2. How do I fix this webpage is not secure?
My website is not secure, how can I fix it?
- Install Secure Sockets Layer (SSL) certificate. …
- Ensure that internal and external links use HTTPS. …
- Verify your website in Google Search Console. …
- Ensure that HTTP URLs are redirected. …
- Update XML sitemap.
3. Is a not Secure website a virus?
It is important to point out that the not secure website warning in the browser not be confused with the presence of malware or viruses on the site. In fact, the warning only indicates that the connection to that page is not secure.
4. Should I trust a not Secure website?
You should avoid conducting any sensitive transactions on these pages, including logging in or providing personal or payment information. Browsing insecure sites could also put you at risk if you are viewing information that is dangerous or not condoned in your country.
5. Why Should you not visit an Unsecure website?
Insecure websites are vulnerable to cyber threats, including malware and cyberattacks. If your site falls victim to a cyberattack, it can impact the site’s functioning, prevent visitors from accessing it, or compromise your customers’ personal information.
Let's Come to the Point;
How To Fix the "Not Secure" website warning in Google Chrome?
Video Tutorial!
We will solve this issue in three ways. ...
1. Purchase an SSL Certificate
To fix the “not secure” message on your website, the first thing you need to do is purchase an SSL certificate. Many vendors, such as Bluehost, Namecheap, GoDaddy, and others, provide these certificates. Buying and installing an SSL certificate will certify that your website is safe when people are using a search engine. In addition to removing the message, you can purchase certificates, such as an Organization Validated (OV) SSL certificate, that indicate to your visitors that your site and other content are trustworthy as well by proving that you are who you say you are. You can choose the SSL certificate you need based on the type of site you are running. Once you have installed your SSL certificate, you will no longer have the warning message for your site when visitors search for you in their search engines.
2. Change Your WordPress URL
It feels good that your site now has a brand-new SSL certificate, doesn’t it? However, completing the steps above is just the first part of the process of eliminating a “not secure” message from popping up whenever someone visits your website. That’s because, if you are running a WordPress site, it will continue to load your old HTTP URL, which means you need to change your URL before it can run as HTTPS.
To change your WordPress URL to HTTPS, log in to your WordPress dashboard, and head over to the settings tab. Navigate to the “General” tab and look for WordPress Address (URL) and Site Address (URL). Change both of them to HTTPS by adding the EXTRA “S” to HTTP. Save your changes, and you are ready to go.
3. Install the Certificate Using Your Web Host
After buying your SSL certificate, the next step is to head over to your web host admin panel and install it. Some web hosts sell SSL certificates. To make it easier for you to buy and install one, you can purchase the certificate you need directly from your web host if they offer such services.
When you visit your web host, head over to the SSL tab, and click on the “Install” button. A list of the SSL certificates available to you will be displayed. Select the SSL certificate you wish to install and it to the domain of your choice. Paste the contents of your certificate text into the provided fields. After filling out the fields, click on the install button, and your certificate will be installed instantly. Keep in mind, however, that it may take a few hours for your changes to populate across the internet and be visible to your visitors.
- If you got this article helpful leave a comment below in the comment box. It will motivate me to write better articles ahead. And if you have any queries, Let me know! Thanks for reading the article!!!

Authored By The Er. Pramod Adhikari!
The Blogger, Auther & CEO’s The Infinity Company! B.Tech in CSE (Computer Science & Engineering) from Sambhram College, Bengaluru-560097, Working Worldwide as Software(Web/App) Developer!

